–
Select, Split and Reverse Audio in Logic Pro X
Hey there! Dr Duce back again with another great set of music tech tips for you. Now in today’s tutorial I’ll be covering something that’s pretty powerful and will most certainly help you in your music production and editing process when working in Logic Pro X. I love incorporating reversed audio region clips into my productions and I’ll show you exactly how I go about doing this. There are of course conventional ways of reversing your chords played in using software instruments but the method hope to show you will definitely speed things up when you’re producing your tracks.
Split Regions or Notes into Multiple Chunks Instantly
Also, I will be showing you how to select and split regions into predefined lengths. What I mean by this is, let’s say 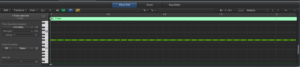 I’ve got a 16 bar audio or MIDI region or even a single note in the Piano Roll window region and I want to automatically chop this into individual I’ll use a very simple key command and click process to achieve this in an instant. This is really powerful and a fantastic time saver.
Reversing Audio Regions Instantly
 So as I mentioned above I really like to include a lot of the reversed audio textures in my productions. The conventional way of doing this where maybe you have a MIDI region playing back something like a pad from Alchemy, you would need to bounce this to audio or use the Convert to New Audio Region key commands and then bring this new region into the Logic Pro’s Audio Editor. You would then need to chop the chords up using destructive editing then use the Reverse function which is also a destructive process in order to reverse your chords. However I’ll be demonstrating a much faster way of doing this by using the reverse option which sits very discreetly in your regions preferences on the channel strip.
Fading Audio Regions In and Out
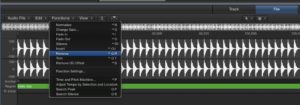
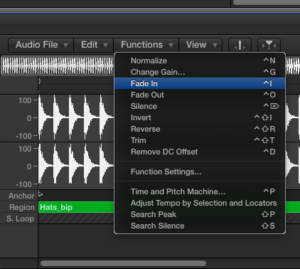 Another great little feature which will save you a lot of headache when it comes to reducing the amount of glitches, clicks and pops that you get when you’ve got chopped audio regions is the use of The Fade in and Fade out Tools. Now there are a number ways of doing this which include actually opening up each audio region and using the Fade In and Fade Out key commands in the Logic Pro Audio Editor. This is of course destructive editing and once you have saved your project you won’t be able to restore the attack and decay portions of your audio clip. Secondly you can use the fade tool from the Logic X Tools Menu to create a fade in and fade out on the audio region as I demonstrate in this video. There is yet another way in which you can accomplish this task and that is to create a volume fade using automation on the actual channel. These are all very handy and useful techniques. However the technique I’ll be showing you will definitely be much quicker and much cleaner.
Watch the Video Tutorial
So make sure you check out the video and learn something new on how to use these great little tips when producing editing and mixing your Logic Projects. As always do you remember to drop me a line and like the video. Your comments and feedback are very important as they give me a good indication on how effective the tutorials are from your perspective. So make sure you subscribe to the channel as well and stay tuned for more. Peace!